
Come stamp with me! If you’ve ever been curious about how to get started using stamps for your Bible journaling, consider this your stamping for beginners crash course.
{ This post and the photos within it contain affiliate links. If you make a purchase after clicking an affiliate link, my ministry gets a small commission, with no extra cost to you. See my full disclosures HERE. }
I’ve been Bible journaling since 2016 y’all, but believe-it-or-not, I’ve been using stamps even longer…
When I was a teenager growing up in the late 1990’s/early 2000’s, I would regularly visit my local craft store to spend my allowance on a single wood-mounted stamp (and maybe a few others crafty things too!). They were expensive, took up a lot of storage space, and I really didn’t use them as much as I just collected them. I made a few cards with them, but that was it.
Thank goodness, stamps have come a long way since then! Around the time I started Bible journaling, I began to realize that CLEAR STAMPS had become a thing, and they were becoming more and more plentiful. And for good reason! Clear stamps come in sets of multiple stamps, so you get more bang for your buck, AND they’re space-saving! I think I can fit about 5x as many clear stamps, in the same amount of space that my old wood-mounted rubber stamps took up.
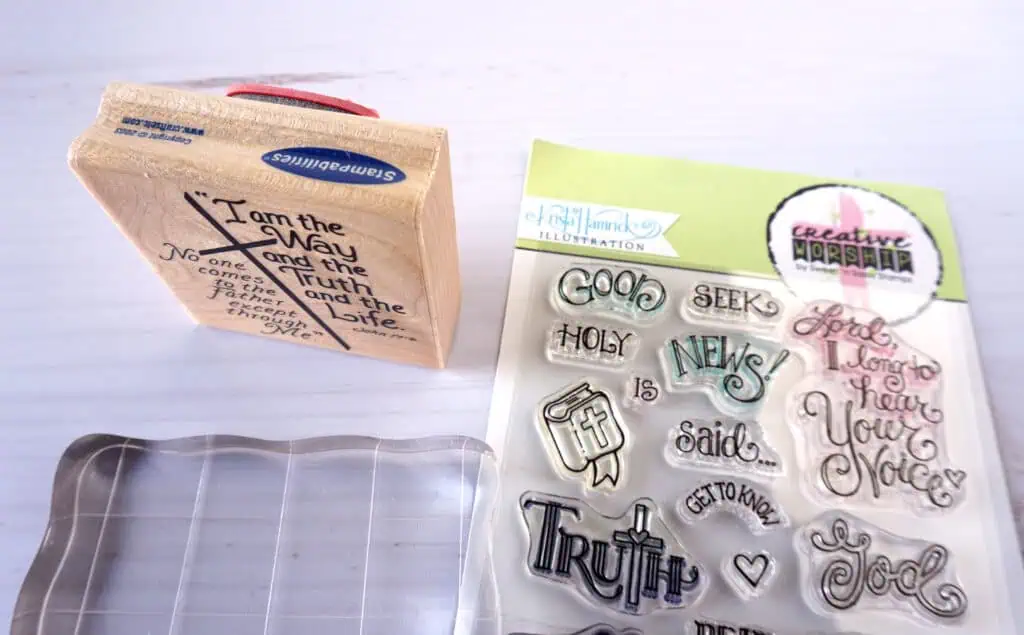
Nowadays, wood-mounted stamps have become scarce, and clear stamps are the main thing. How times change!
But anyway, enough about the history of stamps… you came here wanting to learn the basics of stamping, so let’s go… 😃
Stamping for Beginners: How to Use Stamps in Bible Journaling
Stamps are such a great tool for Bible journaling, because they allow you to add artwork that brings the Scripture to life, even if you’re not an “artist” or “creative”. All you need are a few basic supplies to get started stamping for beginners! In the video below, I break down all the essential things you need to know, plus we walk through a few different stamping techniques in this Hebrews 11:1 page.
(If you prefer to read instead of watch, keep scrolling below the video for all the details…)
Stamp Quality: Acrylic vs. Photopolymer
When you start shopping for stamps, always look for the ones that are made of high-quality photopolymer. Most clear stamps fit that bill, however, some brands still make theirs out of acrylic, which is not very good quality. Acrylic stamps tend to be flimsy, not stick to the stamp block as well, and just generally feel cheap. Photopolymer on the other hand, is very dense and sturdy, sticks to the stamp block extremely well, and is overall a better quality material.
The great news is, my favorite Christian woman-owned stamp company, Creative Worship Stamps, makes their stamps with ONLY high-quality photopolymer, so if you order from them, you’re golden! A few other (non-Christian) brands that have great quality stamps, are Hero Arts, Altenew, and Catherine Pooler… I’ve always been pleased with their stamps as well. (There is only one brand I would absolutely NOT recommend, and that is Crafter’s Companion… I’ve gotten several stamp sets from them, some of which have deteriorated after a few years, and are obviously poor quality).

Clear Stamp Blocks: How to Mount Your Stamps
So, you might be wondering, how do I actually use clear stamps? Well, the first thing you’re going to need, is a stamp block to mount them on! Stamp blocks come in different sizes, but I recommend starting with just a medium size, and you can always add more later. I have just three sizes: SMALL (2″x2.5″), MEDIUM (2.5″x3.5″), and LARGE (4.5″x6.5). Medium is good for most stamps, so it’s the size I use most often.
To mount the clear stamps on the block, literally all you do is peel the stamp of the clear sheet it came on, and slap it on the stamp block! You can peel it off and reposition as needed, but you’ll be amazed at how easy they stick (and stay put!).
Ink Pad Types & Considerations
Okay now, let’s talk about ink! There are several different types of ink, which can get kind of confusing, so I’m going to break it down for you in a nice tidy list. 😉

- Dye Ink: This type of ink is thinner, more transparent, and tends to sink into the paper after stamping. I’ve never been a very big fan of it myself. The one upside is, it dries fast (so you wouldn’t have to wait around for it to dry, and there’s less opportunity to smudge the wet ink).
- Pigment Ink: Is a thicker, more opaque ink, which tends to sit on top of the paper after stamping. It does take longer to dry, but I love pigment ink because it doesn’t bleed through the Bible paper, and it produces a much richer color than dye ink. And, because it stays wet longer, it’s great for embossing. I love that I can just keep a clear embossing powder, and use it with any color of pigment ink pad. (For more on embossing, check out this post!)
- Hybrid Ink: Many ink pads on the market nowadays are a hybrid of both dye and pigment, to harness the best qualities of each. But, that means there is a lot of variability between brands of ink pads, since they each have their own blend of ink and thus have different qualities. If you’re interested in trying hybrid ink, I would recommend sampling a few different brands before picking the one you like best.
- Permanent/Archival/Specialty Inks: There are some other types of ink that don’t necessarily fall into the obvious categories. Archival Ink is one such brand, which is formulated to be waterproof and permanent. I like it for certain situations, where I want to stamp an image on my Bible page, and then color the image with paints. The Archival Ink is great for that, because it won’t run or smudge even with watercolors painted over it.
As far as brands go, most major stamp companies have their own lines of ink. To date, my favorite top quality pigment ink pads are from Altenew… but, I also like Hero Arts too. A lot of my ink pads are Versa Color brand, but those are becoming harder and harder to find (not sure why), so I’ve started to buy the other brands like Altenew. You can find lots of options in one place, at Scrapbook.com, or on Amazon.com.

How to Stamp!
Okay, now that we’ve covered stamps, mounting blocks, and inks, it’s time to stamp! And it’s pretty easy, really…
- Stick the stamp on the block.
- And then, just tap-tap-tap the stamp on the ink pad to load it up good, set it down in the spot you want to stamp, and press firmly. Lift it up, and voila! A beautiful stamp.
Some TIPS though: Do a test on scrap paper if you wish, before re-inking and stamping in your Bible. You know, just in case the color isn’t what you wanted, or the results aren’t what you expected! Also, not every stamp is going to turn out great. Sometimes, the ink coverage isn’t very good, or the stamp doesn’t make good contact with the paper. In those cases, you can re-ink and try again, or just color in the stamp by hand (like with a gel pen) to make it look better. As with all things in Bible journaling and life, mistakes happen, so just go with the flow!
Stamp Cleaning 101
Last but not least, the cleaning! Your stamps will stay in good condition for longer, if you clean them after use. Staining is normal, and won’t affect the stamp’s future usefulness at all; some inks and colors will leave more stain than others. BUT, what you don’t want, is to leave excess ink on the stamp, as that could affect the stickiness of the stamp, as well as transferring unwanted colors (like the blue ink from yesterday, could transfer onto the yellow ink pad today — not cool).

There are lots of ways to clean, such as:
- Wiping excess ink with a damp cloth, shammy, or paper towel (which is what I do)
- Clean with a baby wipe or other wet wipe (I’ve never tried it, but other people say it works!)
- Use a stamp cleaner or scrubber from your favorite brand (like the Altenew spray I use)
- For specialty ink like the Archival Ink pads, which is a permanent staining ink, use the cleaner specific to that ink (like the Archival Ink cleaner)
Get Started Stamping!
Oh my goodness, I know that was a lot of information, right? So, just to break this down… if you’re a total beginner, and you want to start using stamps in your Bible journaling, just start simple. Get one stamp set (say, the “His Book” set from Creative Worship Stamps), a medium size clear stamp block, and grab your first ink pad (in your favorite color!). And just try it out! You can do a lot actually, with just that one stamp set… and you can always add more later.

Hi! Thank you so much for visiting Divine Creative Love. I’m a Jesus-lovin’ girl, artist, designer, and general creative-at-heart. And, I have narcolepsy. I blog about faith in God, overcoming challenges, and creative topics such as Bible journaling. If you’re new here, be sure and subscribe to my list so you won’t miss anything!